Showing posts with label Baby. Show all posts

Thursday, June 30, 2011

One Last Baby Shower Post

Okay here is the last post of what we did for this past baby shower.  You know after doing three baby showers this year and not having another one to do I think I might go crazy:)  Any one want me to throw them a baby shower???
Anyways here is the last thing I did.  I got the idea from Sarah Ortega

Onesie Cupcakes and how cute are they?  They were simple to make, once I got the hang of them.  Sarah suggests using your hand to make the cupcake top, then roll the receiving blanket with the onesie in it.  That method for some reason did not work for me.  So I rolled the blanket but I used two fingers in the middle to insure I had space, than I placed the onesie over the blanket and made the shape I wanted.
Also be sure to buy the larger coffee filters for the wrappers.  Otherwise you will end of with over 1000 coffee filters and you don't drink coffee...
Here's a view from the top.
Oh I love them.  And they were on a pretty white cake stand too.
One more thing to show you.  My mom made a diaper cake and she did a pretty good job too. 

I just love the bright summer colors!!!  And I love that I didn't make it:)

I hope you are having a great summer!

Thursday, June 23, 2011

Paper Garland

So I have a new favorite Party Decoration.  Stacked paper garland.  It is so cute, fast and easy to make and really inexpensive.  I got the idea from Kojo Designs.  You can read her tutorial on it there too. I made it for the baby shower I did last week but trust me I will be using this idea over and over again. Here is how mine turned out.
I tied a balloon to the bottom because I didn't use card stock for all my pieces so they were kinda curling a little bit.  I think next time I will glue two pieces of my non card stock together so it has a front and back and a little more weight.
But over all I would say this project was perfectly imperfect.  And that is how I like to do things.  The solid card stock I used was 8X11 paper and the colored pattern paper was 12X12.  So I cut a variety of strips that were 12 inch long, 8 inches long and 11 inches long.  I cute them any where between 1-2 inches thick and I think the variety was just perfect.  I LOVED how they turned out.  I made 6 and hung them around the room.  All 6 took be between 30-45 min from start to finish.  How awesome is that. 
So they next party you throw and you need and cute, inexpensive and fast decoration these come HIGHLY recommended by me.
Enjoy!

Monday, June 20, 2011

Baby Shower Rattle Cookies

Do you remember the baby shower invites I did a little bit ago?  Well The baby shower has since come and gone. (That along with Fathers Day and Birthday Parties kept me away from the computer last week. Sorry.) But we used the bright beautiful colors on the invites in the rest of the stuff we did.  So today I am going to show you the dessert I made.  Cookie Pops or Baby Rattles whatever you want to call them.
I think they turned out so cute.  I just made a yummy sugar cookie recipe and divided it in half.  Into one half I added yellow food coloring and a little bit of lemon extract.  I glued those cookies together with a lemon butter cream frosting.
The other half I added pink food coloring.  I glued them together with a chocolate ganache.
When I made them I did not stand them up immediately.  I left them on a cookie sheet in the fridge until a little bit before the shower started.  This was gravity would have a hard time conquering them.
To serve and display them I covered a Styrofoam block with cute paper.  I could not find a glue that would adhere the paper to the Styrofoam unfortunately so I used little satin pins.
Of course the little bow around the stick gave them the final cuteness edge and I think everyone enjoyed them.  It was really a fast, simple, cute and perfect dessert for a baby shower.

Enjoy!

Thursday, June 9, 2011

Baby Shower Invite

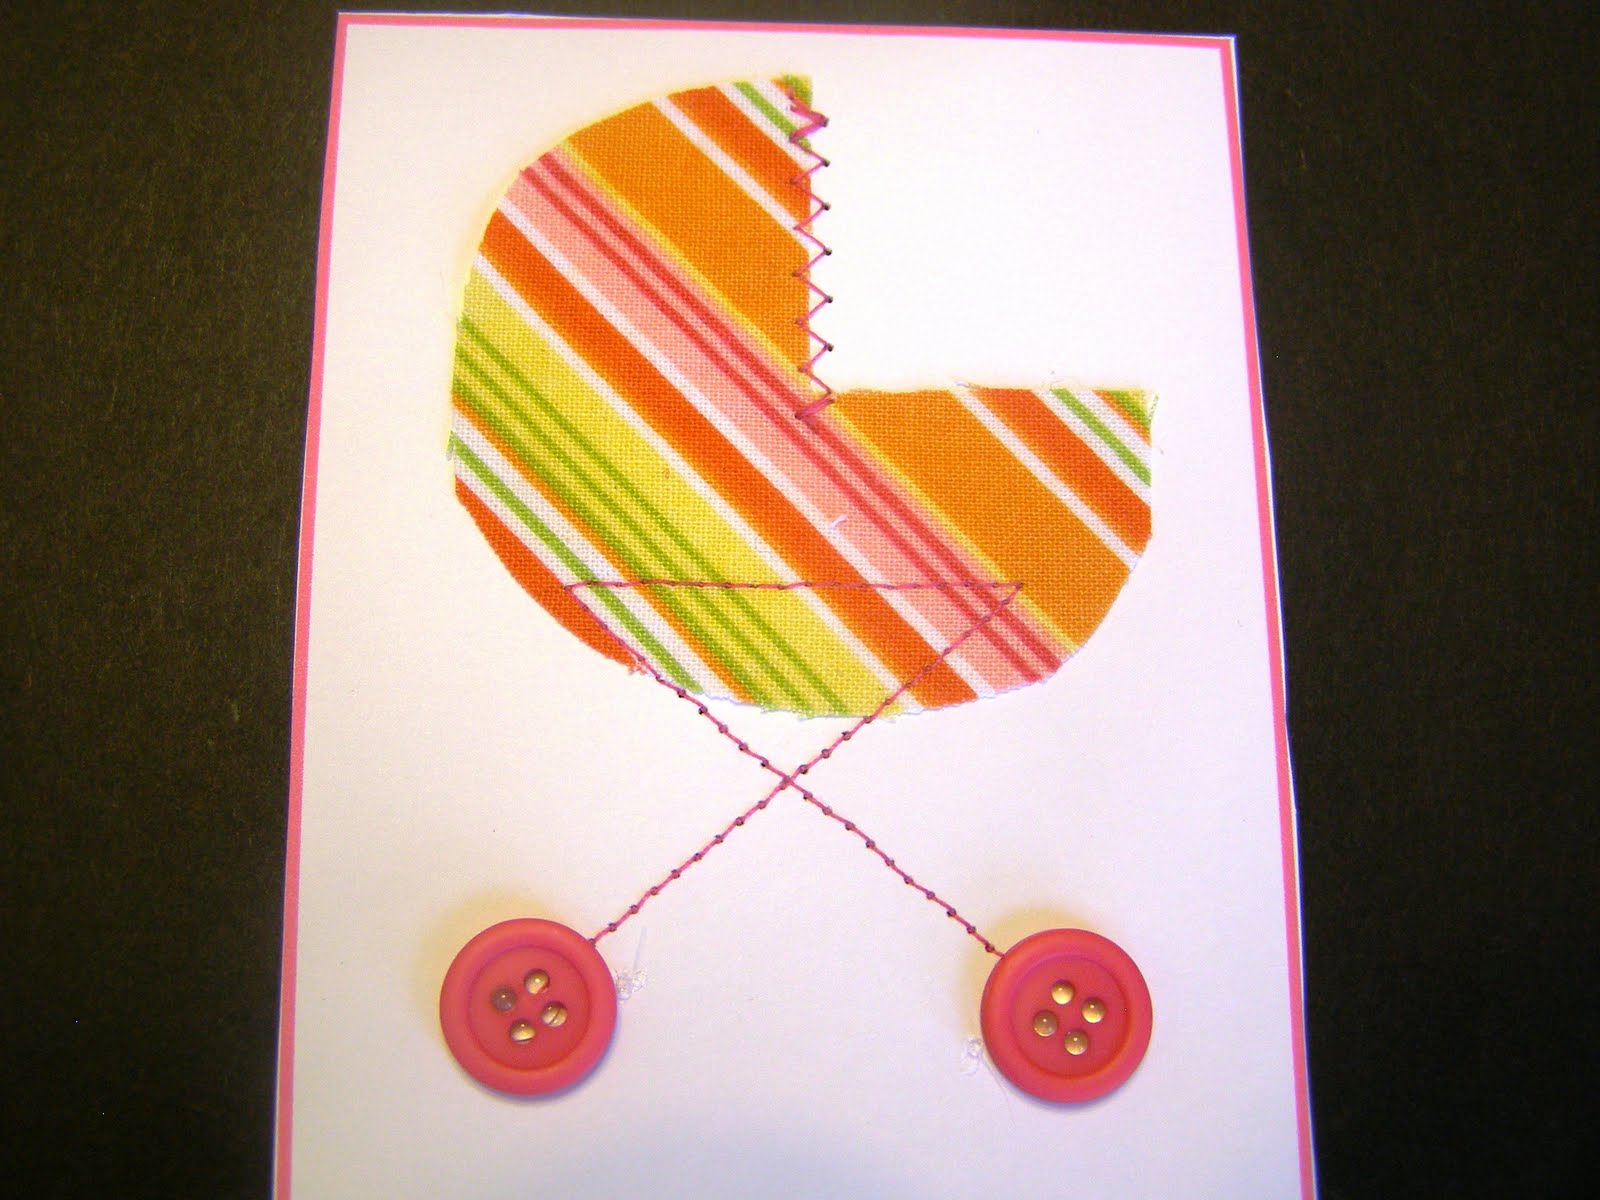
So I am currently working on my 3rd baby shower for this year.  I am working with my mom and sister and we are keeping it simple.  I am in charge of the invitations and when I saw this idea from Anna Maria Horner and here I had to do it.  Plus I already had everything I needed on hand.
So here is how they turned out.


Sooo cute!  And so easy.  I just cut a oval shape and cut 1 corner out for my template.  Then I cut out all my fabric and I used fabric glue to glue them onto the invites (that is what I had on hand, I ready someone else who used glue dots which would work too.)  Then I sewed them on and used hot glue for the button wheels.  So easy and so cute.

Tuesday, May 24, 2011

Book Themed Baby Shower

So I showed you a little sneak peak of the baby shower last week with my Wild Things Onesie.  Well here is how the rest of it went down.  First off I have to throw out a huge THANK YOU to the awesome lady who worked on this with me.  So I cannot take credit for everything you are about to see.  So we decided to do a general book themed shower, but then we focused down to 4 books; Where The Wild Things Are, Curious George, The Cat in The Hat and  The Little Engine That Could.  If you haven't guessed yet the baby is a boy. 
As usual I am going to apologize for the pictures, I have a crummy camera and I always seem to be in a rush...
Here are the onesies to go with the books (I could never get a design for The Little Engine so there are only 3 onesies.)
The Curious George Onesie melts my heart.  Well they all do.  Let's just say I really want a baby boy after making those onesies.  (Do you want a tutorial on how I did the Curious George Onesie?)
I didn't make this banner but it is so cute I have to show it to you.
It has so many cute details.  I am impressed.
I also didn't make this but again sooo cute.  Box cars to hold the sandwiches in.
And here is the rest of the food table.
I had the idea to use coconut shells as my fruit dip holders since this was a more tropical fruit platter.  I think they are cute.  I made coconut whip cream as the fruit dip to go into the coconut shells and it was yummy.
The place we did it at had these beautiful windows so we just put up a few of our other favorite children's books in the windows.

We took each book and made a table centered around that book.  I was in charge of  the Dr. Suess and Curious George.  And I just noticed that for some reason I don't have a picture of the Suess table but I used many of the same things I did from the Dr. Suess baby shower, just on a smaller scale.  Here are the rest of the tables.
The balloons were floating when I left to set up, but by the time the shower started they looked like this.  I bought one of those cheap helium tanks from Wally World, and well they are cheap.  I wish I would have taken the water balloons in somewhere to be filled and the effect would have been much cuter.  Also since they are not floating they are covering up the bowl that "George" is sitting on.  I just used a trifle bowl and filled it up with limes and bananas.
Not mine but I love how wild and green it feels.

Look at those place mats she made with the railroad tracks on the edges.  What a cute idea.  She used foam stickers so they would be more 3D.

So there you go.  I think it turned out very well and oh so cute. 

Tuesday, May 17, 2011

Where the Wilds Things Are Onesie

So I have another baby shower I am doing this week and I have been busy getting things ready.  But I had to take a break to show you this onesie.  We are doing a children's book themed shower and we are focusing on 4 main books.  One of which is Where The Wild Things Are.  I am making a onesie to go with each book and this one turned out super cute.  I knew I could make any of the wild things and even re-creating Max would be rather difficult so I simplified it and came up with this.
 Super cute and simple.
I just drew a crown onto the paper side of some fusible heat bond.  Ironed that onto some yellow fabric, cut the crown out, peeled the paper off, ironed it to the onesie and sewed around it. 
For the words I printed off the letters in the size and font I wanted, traced those letters onto freezer paper and used an x-acto knife to cut the letters out (Oh how I wish I had a silhouette.)  Then iron your freezer paper into place and I decided on a fabric paint marker to paint the words on.  I chose this so it wouldn't bleed as much, drys faster and I have a little more control.  I did get a little antsy though and took the center out of the "a" to early to it smudged a little.
But I think it turned out pretty darn cute.  Makes me wish I had a little boy.

Now one more piece of business...
My friend who blogs over at Mrs. Crafty Mama's  nominated me for a versatile blogger award.

With this award I am suppose to list 7 facts about myself and then nominate 7 blogger friends as well.  Well I am kinda a bum so I will list the 7 facts but I just don't know who I would nominate at the moment.  (It's called my brain ain't working because there are only 6 days in the month of May that something is not written on my calendar to do.)  If you want to be nominated consider it done:)
So here are 7 things about me...
1- I am the youngest of 6 children
2- I got married at 19 yrs old
3- I have a degree in Elementary Education
4- I have a super hard time being organized
5- For my birthday next month I would like a silhouette machine (hint hint hubby)
6- We just got a dog on a trial basis (it's a long story)
7- I love being a mom!

So there you go. 

Thursday, January 27, 2011

Dr. Suess Baby Shower {Food Labels}

So the baby shower was last week and it turned out great!  I believe my sister-in-law was very happy with it.  Except for one thing, I am a basket case.  You see I forgot my camera, but that's not even the bad part.  The bad part is I had my camera in my purse, so forgetting my camera meant I forgot my purse.  So please don't tell anyone that I drove over 50 miles last week without my drivers license.  Anyways that also means I don't have pictures of everything finished and put together.  But I still have a few pieces of the shower I can show you.  So here we go.
So the mother of the mom was in charge of the food and she had seen the idea of naming your food cute Dr. Suess things.  I believe she got the idea from here.  So she asked me if I would make up cute little labels to go with the food of what they are and this is what I came up with.
 Aren't those soo cute.  I am so happy with them I have to show you each one close up.


 For this one I have never read Hooray for Diffendoofer Day so I am not sure if this image is actually from the book but it's what came up when I googled it so I ran with it.


 So here is how I made them.  I found the images I wanted to use and opened them in paint.  Then I made them the size I wanted them and added the words.  Then I printed them off.  To get them to stand up I just cut extra pieces of card stock the were about 2 inches thick and just a little bit shorter than the width of the card.  I folded that in half then glued it on like so.
 Since the baby was a girl I wanted to add a little extra girly flair.  That's why I added the little rosettes on the side. To do so I used tissue paper and cut it about 1 1/2 inch's thick and made the rosettes the same way you do the cute fabric rosettes you put onto head bands.  If you are unsure of how to do that here is a quick tutorial.  (sorry I didn't take pictures while I was making them so I just grabbed a piece of ribbon to show you how to do this) Start with 1 1/2 inch thickness and make it as long as you can.
 Start twisting your material/tissue paper/ribbon :)  Whatever you are using.
 After you twisted a little bit roll up what you have twisted. Glue it with hot glue frequently. (I have a sudden desire to go get a manicure, sorry.)
Then continue to twist and roll and glue.  Twist, roll, glue.  Until you are happy with the size.  Then put some glue on the back of your rosette and stick the remaining paper (about 1 inch if you have more left trim it first) to the glue.  And you are done.
As always if you have any questions about anything I have done feel free to ask. I think I figured how to make it so you can print them.  If this doesn't work please let me know.  Anyways for the printable labels please go here.

Saturday, January 22, 2011

Dr. Suess Baby Shower {Advice Book}

So I made this little advice book for the shower for people to write in.  I thought it turned out cute.  I am by no means a computer printable expert of a paper crafter expert so there are flaws, but I was over all happy with it.  I just searched a bunch of Dr. Suess images until I found ones I was happy with. I left a space on the left side of all of them and I hole punched them, then glued them together then tied ribbon through the hole. So here it is.  I thought this was a perfect cover image.
 I opened it into paint so I could change it a little and I added this.
 Here is an example of one of the inside pages. I used text boxes to make the lines then edited the text boxes to make the "box" disappear.
I had a bunch of others but I didn't want to bore you with them all.  But over all I thought it turned out cute, for something that was a big learning project for me.
Thanks to my hubby for helping me figure out some of the editing things that I couldn't figure out on my own :)

Monday, January 17, 2011

Dr. Suess Prizes/Decor

Here is some more cuteness I have been working on for the Dr. Suess Baby shower I am doing later this week.
So I made these really cute blocks that will work great to set up and just be cute, but I am also going to use them as prizes for people who win the "games" we play at the baby shower.  I simple got some wood blocks and painted them white, then I mod podged cute paper on them then added the vinyl sayings.  Super easy and I already had the blocks and paint and the paper was on sale so really the whole project cost me $8.  I think that's a great deal.
So here they all are is a nice row.  I think they are cute.
 Now for some close ups.  This one did turn out a little "scratchy" because I wasn't generous enough with the mod podge.  But still cute.
 This one is my favorite.  I just LOVE the yellow!
 This one has my favorite quote on it. 
 And this one I did in cute purple and pink paper because the baby is a girl and I thought it was a good one to give to mom and baby to take home.
So that was a fun cute project.  Plus it was easy and inexpensive so I think it was a "win win win". Plus wouldn't you love to win one of those at a baby shower?

ps. extra bonus points for whomever can name the show that a "win win win" comes from :)

Thursday, January 13, 2011

Dr Suess Party Favors

As I mentioned in my last post I am working on a baby shower and it's going to be a Dr. Suess theme.  I am excited for it. I am working on putting together some party favors and I am not 100% sure which one I want to do.  So the basic idea is I take a tiny baby food jar and fill it up with red, white and turquoise candy.
Here is idea one: It just has a few pieces of taffy in it.
... and the inside.
 Idea 2 has red swedish fish in it and white sixlets candy.  Then a blue pixie stix tied on it.


 And idea #3 is blue rock candy, swedish fish and sixlet candy.


 Here they all are in a row and I kind like this affect which makes me think I oughta do a mix of all of them.
Or maybe I will just forget it and hide myself in a dark closet for a minute while I snack on the inspiration.


So which do you  like the best?  Or would you do a different mix.  I am open to new ideas.

ps. Sorry about the terrible lighting.  I am beginning to wonder what the sun looks like.