So the tutorial I am using is from Crap I've Made. Char is amazing and very humorous. I love reading her sight and learning from her. here are a few of the awesome tutorials she offers.
Do you see that stinken cute bum. I love it. To follow her tutorial go here. I did things a little differently and I came up with this.
First I decided to use 3 different pieces of material instead of the same. It was just the mood I was in.
I am not fortunate enough to have a serger nor do I own pinking shears so I kinda mixed the techniques together. FYI if I had pinking shears that is without a doubt the method I would have used. So simple and wonderful.
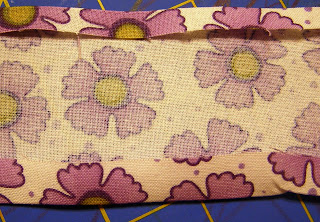
I started by basically "hemming" my material all the way around. I folded a small fold on all sides and ironed.
Than I folded it in again and ironed again.
(yes you do see crayon all over my cutting mat, just ignore it.)
I than sewed my folds down as close to the center as I could. Than right done the middle I did a baste stitch so I could pull it into a ruffle.
Than I followed her directions to put it on.
Helpful tips:
1- Don't think you can eyeball it and skip drawing the lines. This will only lead to you having to unpick it a million times. (Not that I did that cough cough.)
2- Baste your ruffle on first!. This way if there are any puckers in the onsie or you make some other mistake it is easier to fix.
3- Be sure to look inside the onsie before you do your final stitching.
4- The more pins you use pinning it on the better :)
The first onsie I sewed took my something like 2 hrs, but that's because I didn't follow those useful tips I just shared with you. The next one only took 45ish min.
I bought a 5 pack of onsies from carters and I bought my material from a local quilt shop. (There aren't any other fabric stores besides that in this small town. Besides I like the quality of quilting fabric better.) With this, the total cost of each onsie was around $3.50 (This includes the cute little fabric flowers I made as well.) And they were totally worth it.
Here are some of the other ones I did.
I think they are so cute! This is really hard for me because I like them so much but.... I have decided to give one of them away. Lucky you!!! FYI they are 3-6month in size.
How to enter:
1- Leave a comment
2- Did you see my cute new button? Well post it on your blog and leave a comment telling me so.
3- Become a follower.
4- Tell people about me. Every time I see you name in a comment you will be entered again.
The dead line to enter is Wednesday the 26th at midnight and I will announce the winner Thursday the 27th in the morning.
I you don't win but you just gotta have one and you don't want to make one I will be selling some at my etsy store. (There is a link to my etsy store over to the right, go ahead and visit it) I will have them up after the drawing.


16 comments:
Ohh... these are cute! And I am expecting a baby girl... I wouldn't mind winning one :-)
Do i feel guilty to enter with out a girl... maybe, but i do know a mom who just adopted twin girls that i think they'd love this! I need some of your housewater! :)
I follow you via my google reader :) LOVE IT! I never miss anything :)
Hey, those are too cute. I love the hearts onsie. I am so impressed how you are being so crafty. I am going to post your link on my blog and tell all of my friends.
So cute! I love all the different colors you use for one onesie! I saved this is my book marks. I have so many onesies that could use some ruffle bums. :)
christini8.0@gmail.com
I am a follower
christini8.0@gmail.com
Cute Liz! I could use one of these for my new little girl coming! No snow here today. Phew! It was overcast all day, but just right for an outdoor preschool graduation.
I had your blog on my RSS feed before then took it off when you stopped posting and now it is back on again!
I added your button to our blog!
I'm so glad I'm not the only person with crayon on their cutting mat. I'm visiting via Crap I've Made's link. What a great idea to review tutorials. You can review mine anytime, only if your nice! (I'm no professional, that's for sure)
my cutting mat has marker. i think the idea for reviewing tutorials is a fantastic one. good for you!
i'm also a follower (and i meant to say that I adore that GREEN ONE)...
I love Carters onesies. I get them shipped to me in Australia I love them so much!
...is that wierd? LOL
Love your idea of posting tutorial reviews. Definitely going to follow you to see what you have to say! Found you through Crap I've Made Blog! If only I had the time to try out and review all the things I want to do around these blogs! I will live vicariously through your posts! ;)
kimberly I have another giveaway happening for a happy birthday banner. I hope I live up to your expectations. Let me know if there is something you want me to do.
Post a Comment